What's New
What's new in Anka Virtualization 2.3.0
This release does not make significant changes to macOS Catalina (and older) VMs. They will function the same as prior releases of Anka. We recommend updating addons regardless.
Use Anka for free!
Our new Anka Develop license is a free, but limited, version of our Anka Virtualization software. You will see the license enabled by default after you install the Anka Virtualization.
Anka Develop is currently restricted to running a single VM at a time. It also does not include VM suspension, tagging, or use of the registry CLI commands. Finally, it will only function on Macbook, Macbook Pro, and Macbook Air hardware.
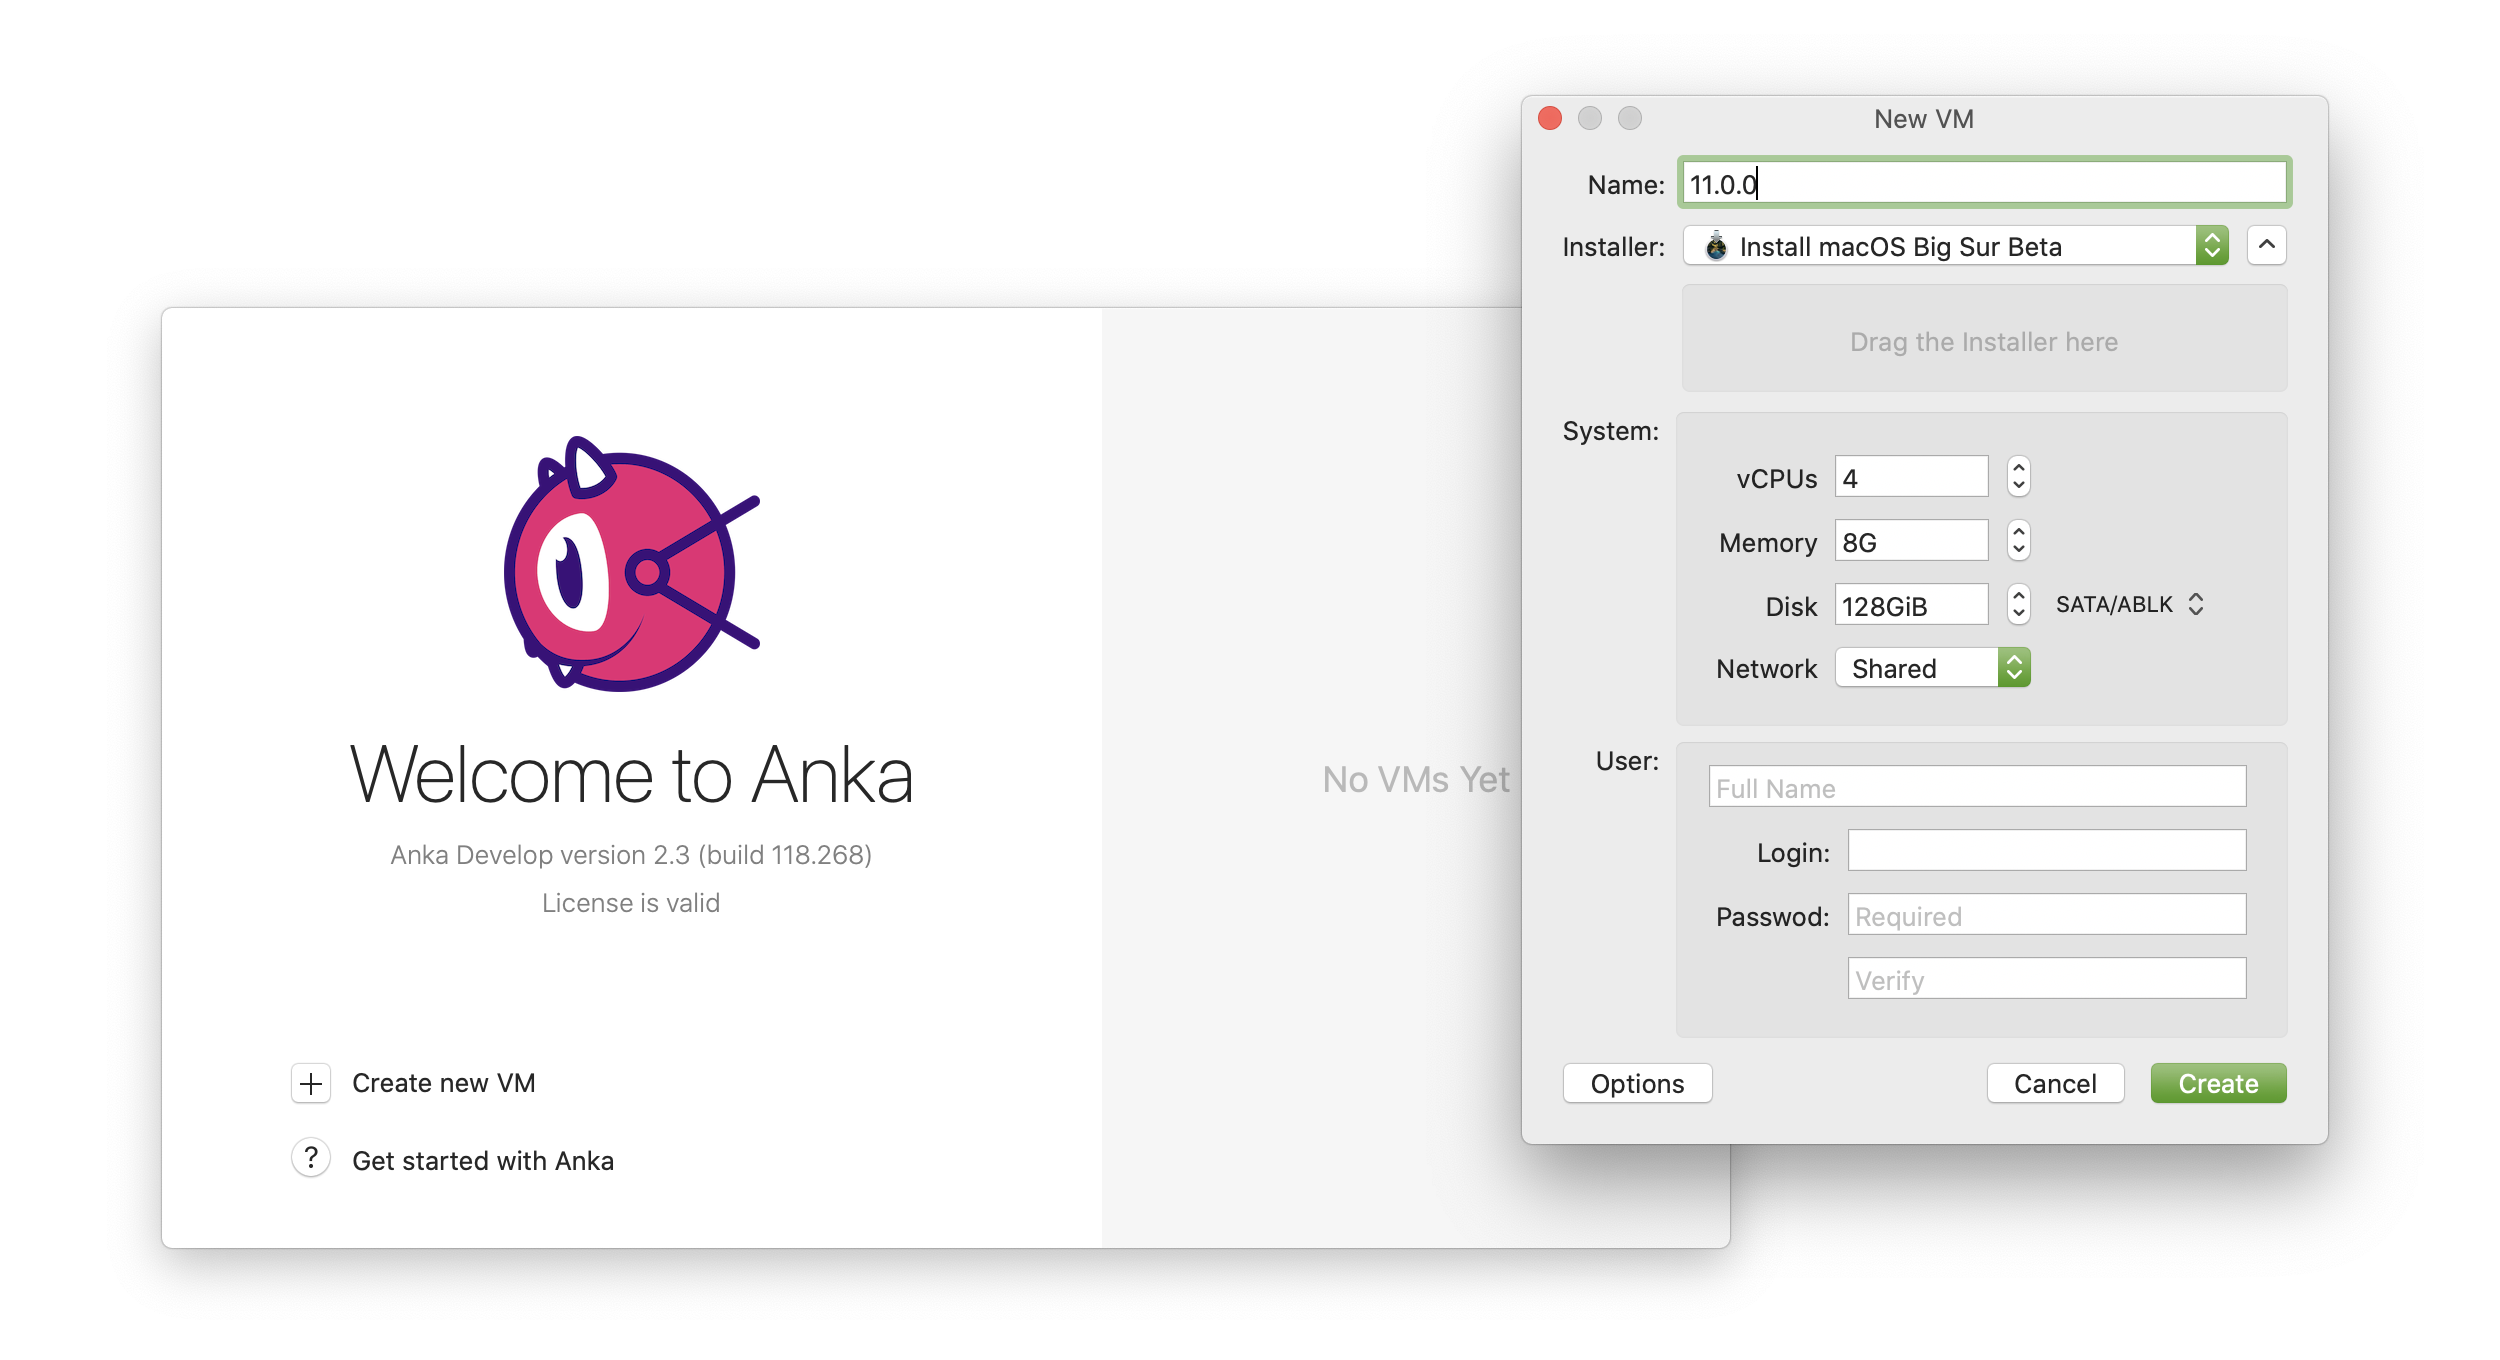
VM Management UI
We now have a management UI allowing you to start, stop, delete, and create VMs. This is used as an alternative to the CLI.

Big Sur (11.X) Support
You can now use anka create to create 11.X macOS versions.
Anka is now driverless!
Starting in Big Sur, we have recreated our driver addons as driverless addons. This allows for much more feature flexibility moving forward. This opens up many opportunities for our developers to add new features.
New anka cp / Deprecated anka mount and anka run automatic mounting
Due to security changes in Big Sur, we've had to rewrite all of our addons to be driverless. This means that anka mount and anka run (mounting) no longer work with Big Sur VMs. However, they do still function for Catalina and below.
As an alternative, we now have anka cp which allows transferring files into the VM. The transfer speeds have shown to be much faster than SCP.
> sudo anka cp --help
Usage: anka cp [OPTIONS] [SRC]... DST

  Copy files in and out of the VM and host

Options:
  -R      copy the src and its entire subtree to the dst
  -L      all symbolic links are followed
  -H      symbolic links in the command are followed
  -P      do not follow a symbolic links (default)
  -f      remove and create the dst file on open failure
  -n      do not overwrite an existing file.
  -p      preserve the source file attributes
  -a      same as -pPR options
  --help  Display usage information
❯ time anka cp ~/VirtualBox\ VMs/cloud-client-side-ha-1/cloud-client-side-ha-1.vdi 10.15.6:/Users/anka/
anka --debug cp  10.15.6:/Users/anka/  0.86s user 20.60s system 4% cpu 8:53.85 total
Compare the ~9 minutes it takes for anka cp to how much it takes to transfer the same file with scp:
❯ time scp -P 10000 -v ~/VirtualBox\ VMs/cloud-client-side-ha-1/cloud-client-side-ha-1.vdi anka@192.168.0.110:/Users/anka/
scp -P 10000 -v  anka@192.168.0.110:/Users/anka/  110.61s user 60.88s system 22% cpu 12:46.30 total
Be sure to update addons with
anka start -u 10.15.7to useanka cpwith Catalina (or older) VMs
Customize the Hostname inside of your VM on start
You can now automatically set the VM hostname to the VM name on start by enabling propagate_name:
❯ anka config propagate_name True
If you'd like to customize the hostname, you can set the ANKA_HOSTNAME env first:
❯ hostname
Node-1.local

❯ ANKA_HOSTNAME="$(hostname)-$RANDOM" anka run 11.0.1 bash -c "echo \$(hostname)"
node-1-10180.local
What's New in Anka Build Cloud Controller & Registry Version 1.10.1
Unresponsive VM Monitor
Rarely we see certain dependencies installed inside of VMs causing the entire VM to become unresponsive. Unresponsive or “stuck” VMs can run indefinitely and therefore cause CI/CD jobs to run until they hit timeouts. This is a bad experience for users, so we've added a feature which constantly checks whether or not the command-line inside of VM is responding to a simple command. If it cannot, the Anka Agent on your Node will fail the VM, causing the CI/CD job to receive a failure and then send a Termination request to the Controller.
You can enable this feature when you join your Node to the Anka Cloud with: sudo ankacluster join --enable-vm-monitor http://anka.controller:8090.
You can see the flags and options with:
❯ ankacluster join --help
Joins the current machine to one or many Anka Build Cloud Controllers

Usage:
  ankacluster join CONTROLLER_ADDRESS[,CONTROLLER_ADDRESS2] [flags]

Flags:
...
  --enable-vm-monitor           Enabled unresponsive VM monitoring. This will throw a failure when the VM becomes unresponsive for longer than the --vm-stuck-timeout
...
  --vm-stuck-delay duration     The time between unresponsive VM checks (default: 30s - Duration examples: 3500s, 20m, 5h)
  --vm-stuck-timeout duration   The time to wait until the VM is considered unresponsive (default: 10s - Duration examples: 3500s, 20m, 5h)
What's New in Anka Build Cloud Controller & Registry Version 1.9.0
Track MAC Addresses for VMs and prevent rare collision situations
It's extremely rare that MAC addresses assigned to VMs collide. We've added the ability for the Controller to keep track of MAC addresses and prevent reuse. You can also manually specify the MAC address for the VM using the Controller API.
Your VM Templates and Tags must be in a stopped state in the Registry/on your Nodes to set the MAC address properly.
If you have VMs already running when you upgrade your Controller, they will not be managed by this feature until they are restarted through the Controller.
What's New in Jenkins Plugin Version 2.1.0
Static Slave and Cloud Instance Limits (support for || label operator)
When specifying the label to use in your Jenkins pipelines, you're able to use operators like || (OR). Previous versions of our Jenkins plugin had problems with this as each Static Slave Template you configured would be able to use unlimited instances (as many as your controller allowed). In 2.1.0, you have the ability to set a cap on the amount of instances allowed to be created for the specific Static Slave Template or even for the entire Anka Cloud definition. As an example:
- Your pipeline uses
large-fleet-ios || small-fleet-ios - You have two Static Slave Templates:
- label
large-fleet-ios- has lots of resources per VM, but far less total VMs that can run
- has an instance/VM cap of 5
- label
small-fleet-iosthat has less resources because more VMs are running at once- has an instance/VM cap of 20
- label
- Your large node fleet has a total of 10 VMs that can run at once (5 nodes, 2 VMs per node) (more expensive mac minis with lots of cpu and memory)
- Your small node fleet has a total of 30 VMs that can run at once (15 nodes, 2 VMs per node) (cheaper mac minis with less resources)
When someone runs an iOS build, you want it to use the large-fleet if possible so the builds and tests take less time. With this setup, your pipeline will run and request a VM from the Static Slave Template with large-fleet-ios as the label. However, if other pipeline jobs are already running and using all 5 instance slots, it will then fall back onto using small-fleet-ios.
Notice that our instance cap for large-fleet-ios is 5 and we have 10 total VMs for the large-fleet. This allows other labels for the large fleet the remaining 5 slots at all times if there are lots of large-fleet-ios requests. This helps balance the usage between multiple projects.
Slave/Node name is now available within the 1.8.0 Controller
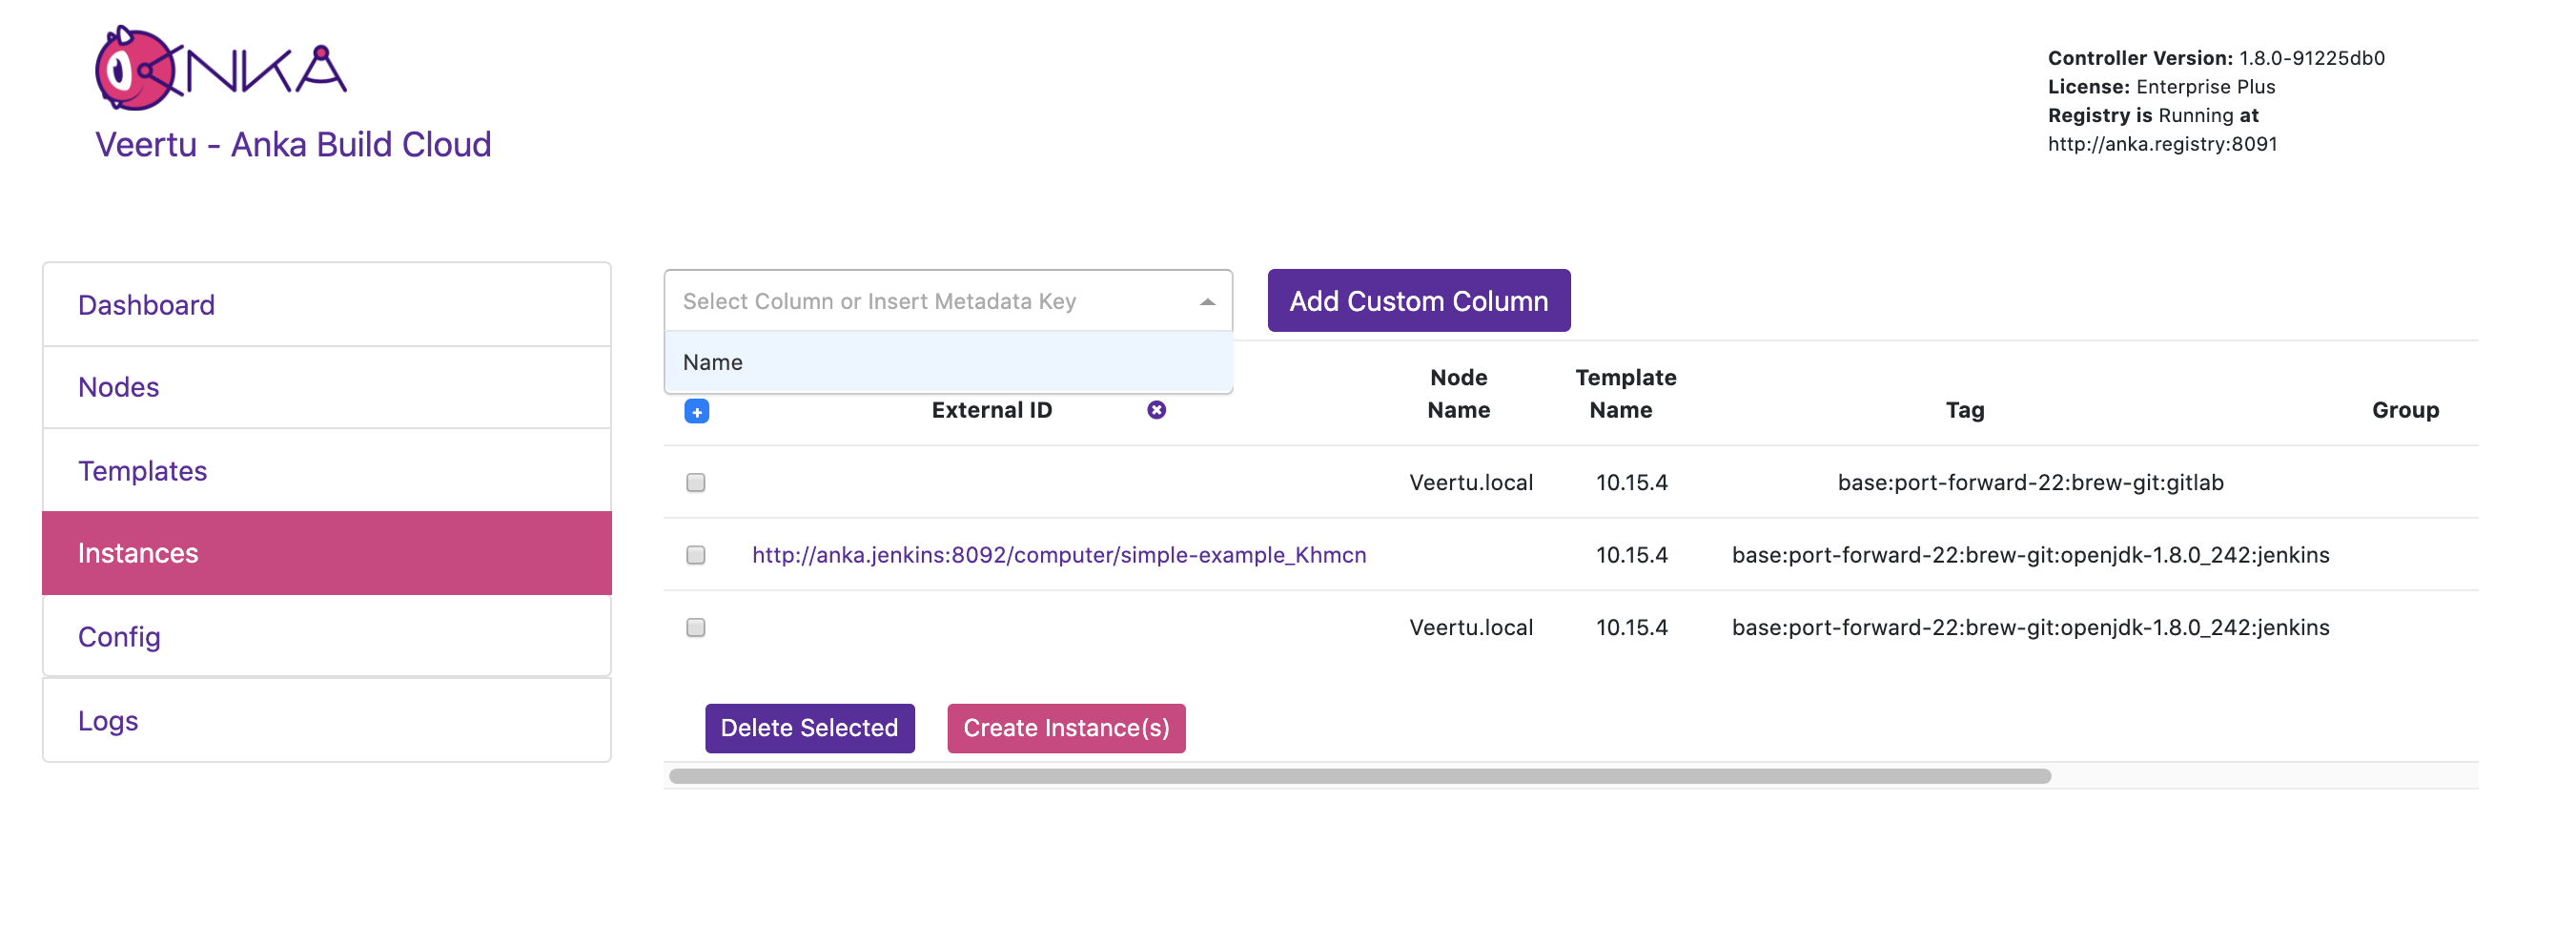
Changes to the way we communicate with the Controller API now allows for the slave name and slave/jenkins UI URL to be displayed under the custom columns.


What's New in Anka Build Cloud Controller Version 1.8.0
Set custom instance metadata and show it in the dashboard

Create an instance with metadata:
❯ curl -X POST "http://anka.controller:8090/api/v1/vm" -H "Content-Type: application/json" \
-d '{"vmid": "c0847bc9-5d2d-4dbc-ba6a-240f7ff08032", "count": 1, "metadata": { "test": true }}'

{"status":"OK","message":"","body":["a681f959-b4db-4f3b-7a88-0384ad146bf4"]}
Then show it as a column in the dashboard:

Change the vCPU and RAM for a stopped VM Template
❯ sudo anka show 10.15.4-stopped
+----------------+--------------------------------------+
| uuid           | 3a65b45e-c08d-44e9-84e2-ba45d646af4a |
+----------------+--------------------------------------+
| name           | 10.15.4-stopped (test)               |
+----------------+--------------------------------------+
| created        | 100 seconds ago                      |
+----------------+--------------------------------------+
| cpu_cores      | 6                                    |
+----------------+--------------------------------------+
| ram            | 10G                                  |
+----------------+--------------------------------------+
| display        | 1                                    |
+----------------+--------------------------------------+
| hard_drive     | 80Gi (16.6Gi on disk)                |
+----------------+--------------------------------------+
| addons_version | 2.2.3.118                            |
+----------------+--------------------------------------+
| status         | stopped 29 seconds ago               |
+----------------+--------------------------------------+
Create your instance and set the CPU and RAM:
❯ curl -X POST "http://anka.controller:8090/api/v1/vm" -H "Content-Type: application/json" \
-d '{"vmid": "3a65b45e-c08d-44e9-84e2-ba45d646af4a", "count": 1, "vcpu": 4, "vram": 8192 }'

{"status":"OK","message":"","body":["ac653ec9-5c7e-4b99-5749-ec0d242ca958"]}
This is change the values of the cloned/started VM:
sh-3.2# anka show mgmtManaged-10.15.4-stopped-1592271338138326000
+-----------------------+-------------------------------------------------+
| uuid                  | e767f994-e366-460a-9dbd-5e2eb9729242            |
+-----------------------+-------------------------------------------------+
| name                  | mgmtManaged-10.15.4-stopped-1592271338138326000 |
+-----------------------+-------------------------------------------------+
| created               | 10 seconds ago                                  |
+-----------------------+-------------------------------------------------+
| cpu_cores             | 4                                               |
+-----------------------+-------------------------------------------------+
| ram                   | 8G                                              |
...
What's New in Anka Virtualization CLI Version 2.2.3
Anka 2.2.3 - May 03, 2020
When using Anka Viewer, provided a way to get out of full screen, after in full screen mode (using the green full screen button on the window's top bar)
Updated license terms
What's New in Anka Build Cloud Controller Version 1.7.0
Disk Usage for Node is displayed in the controller Dahsboard and REST API

Size information for Templates and tags is displayed in the controller dashboard and REST API

Jenkins job/Node information is displayed for the VM provisioned in the controller dashboard

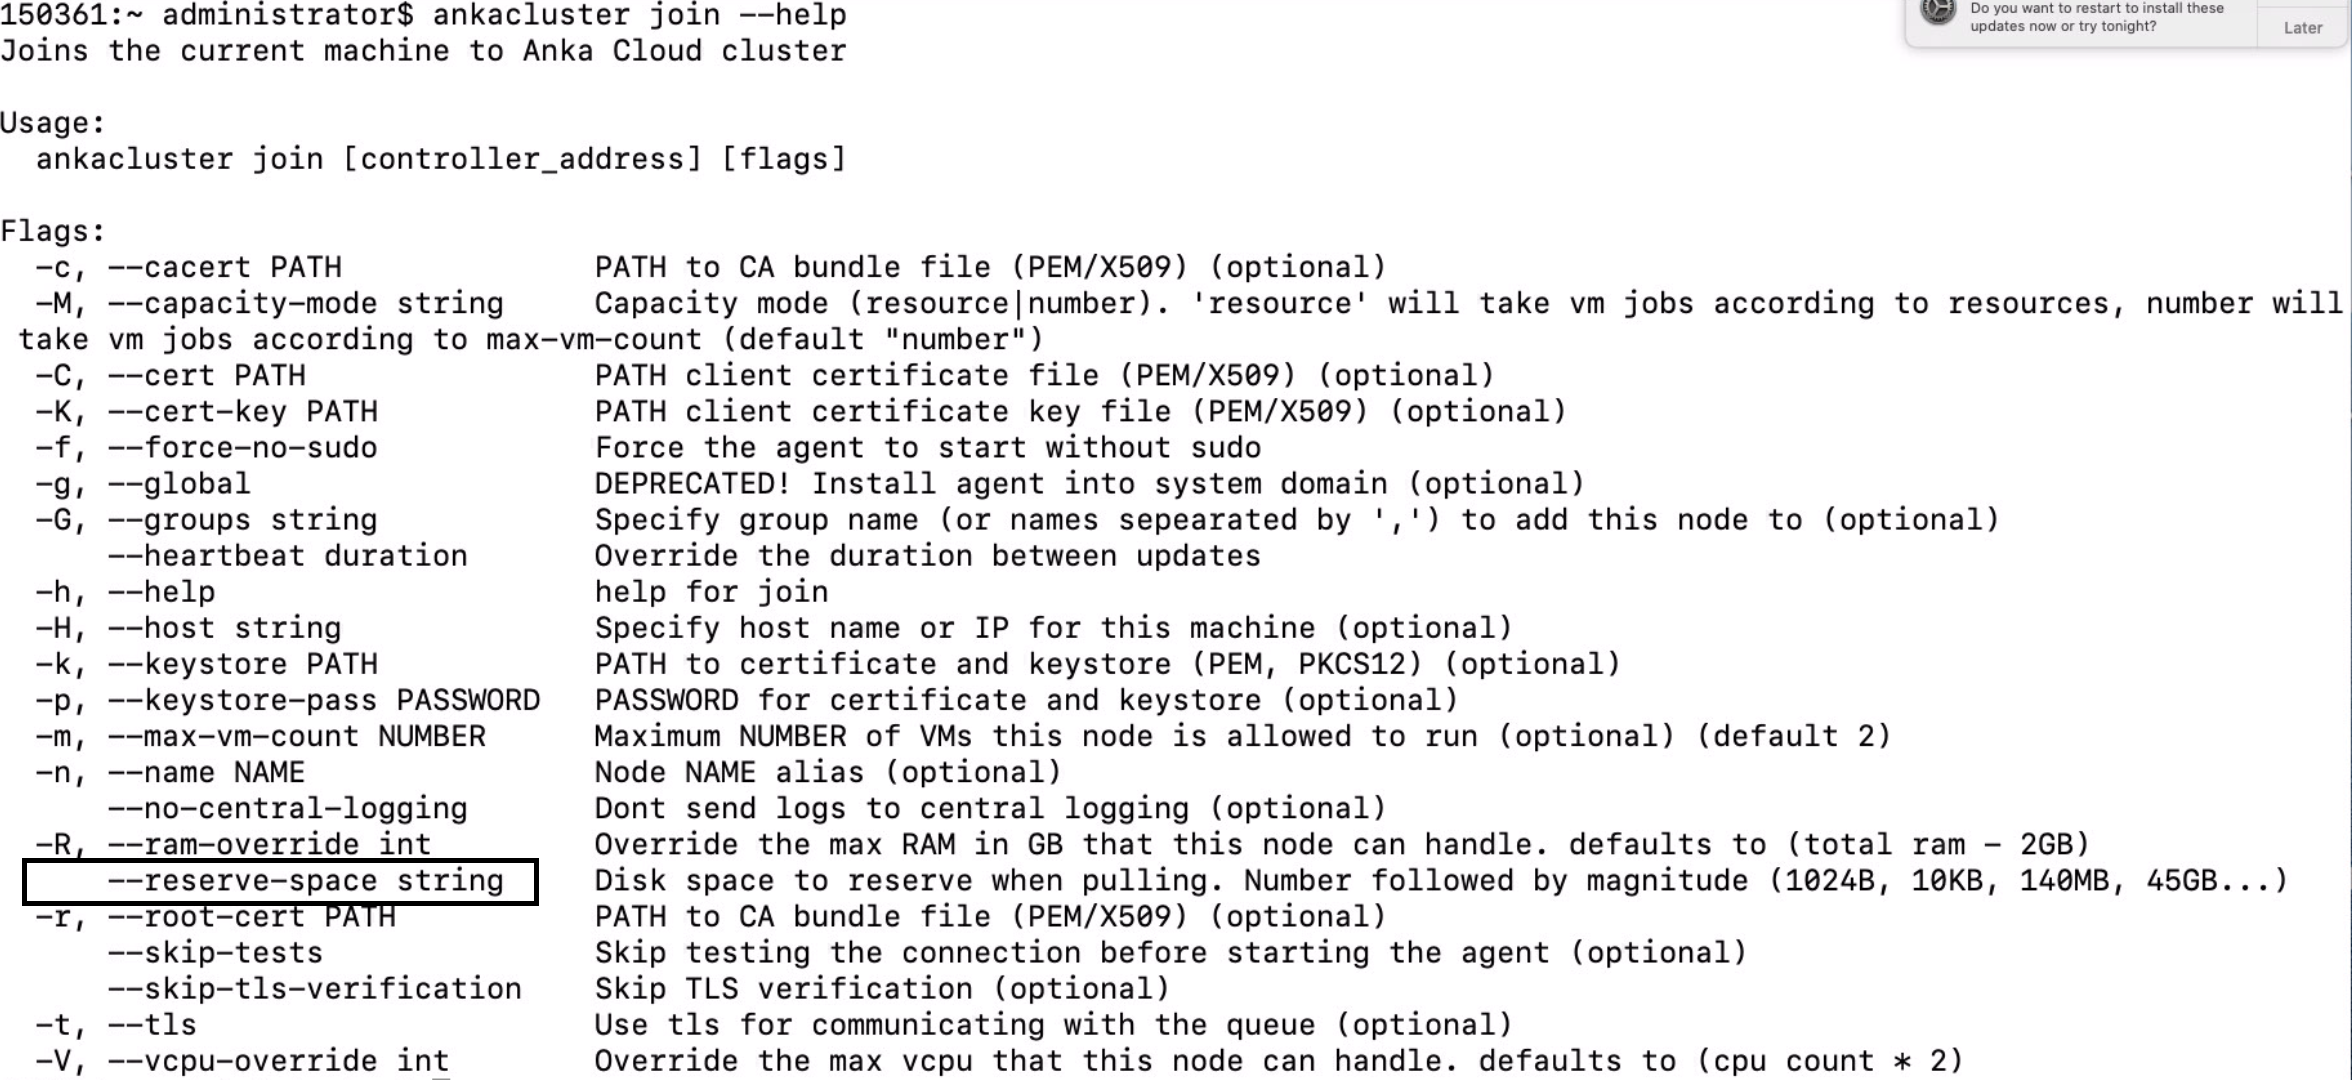
New reserve disk flag in ankacluster join command
When –reserve-space flag is set, controller will always reserve the disk space before pulling VM template on the node. If there is not enough disk space after allocating for –reserve-space, then controller will not pull the Vm Template. This flag is provided to avoid scenario where there is no disk psace left on the node to accomodate for extra disk usage duing builds inside the VM.

What's New in Anka Version 2.2.2
License passthrough from host to nested enabled Anka VM
This feature enables you to install Anka binary package inside an Anka macOS VM and use it create and run Anka VMs.
- Enable nested for the Anka VM in which you want to install Anka binary.
- Install Anka binary package inside the VM.
- Execute
anka config propagate_license 1on the host machine. - Stop and start the nested enabled VM.
- Check with
sudo anka license showinside the VM. It will show the host license information.
Set DPI for the VM
Added a new flag in anka modify set display command to set DPI for the VM.
anka modify set display [OPTIONS]
  configure displays
Options:
  -c, --count INTEGER    configure number of displays (2 max)
  --headless             same as --count 0
  -p, --password         prompt for VNC password
  -v, --vnc TEXT         configure VNC
  --no-vnc               disable VNC access to the VM
  -d, --dpi INTEGER      set DPI (default is 72)
  -r, --resolution TEXT  set resolution, e.g. 1024x768 or 'default' to reset to default
  --help                 Show this message and exit.
Disable VNC access to the VM
Added a new flag in anka modify set display command to disable VNC access for the VM.
anka modify set display [OPTIONS]
  configure displays
Options:
  -c, --count INTEGER    configure number of displays (2 max)
  --headless             same as --count 0
  -p, --password         prompt for VNC password
  -v, --vnc TEXT         configure VNC
  --no-vnc               disable VNC access to the VM
  -d, --dpi INTEGER      set DPI (default is 72)
  -r, --resolution TEXT  set resolution, e.g. 1024x768 or 'default' to reset to default
  --help                 Show this message and exit.
What's New in Anka Version 2.2.1
Set resolution display for the VM with anka modify set display.
anka modify set display [OPTIONS]

  configure displays

Options:
  -c, --count INTEGER    configure number of displays (2 max)
  --headless             same as --count 0
  -p, --password         prompt for VNC password
  -v, --vnc TEXT         configure VNC
  -r, --resolution TEXT  set resolution, e.g. 1024x768 or 'default' to reset to default
  --help                 Show this message and exit.
Send virtual bound events programmatically. This can be used to automate bypass of Apple confirmation dialog.
anka view [OPTIONS] VM_ID

 Open VM display viewer

Options:
 -d, --display INTEGER  Specify the displays to view
 -s, --screenshot       Make png screenshot
 -c, --click TEXT       Send the pointer event
 --help                 Show this message and exit.
anka view VM --click 100,200 will click virtual click event at location 100*200
Note Also available through /Library/Application\ Support/Veertu/Anka/addons/click 100,200
Feedback
Was this page helpful?
Glad to hear it! Please tell us how we can improve.
Sorry to hear that. Please tell us how we can improve.