Configuring OpenID (SSO) based authentication
This guide and feature require an Anka Enterprise Plus license.
Before you begin, you will need to setup Certificate Authentication. This allows your Anka Nodes to join (and attach your Enterprise Plus license) to the Controller properly, since
ANKA_ENABLE_AUTHwill be turned on.
You must have at least one node with a Enterprise or higher license joined to the Controller for these features to work.
Many organizations and developers are already familiar with OpenID Connect (OIDC). OIDC is a layer that sits on top of OAuth 2.0 and performs the authorization necessary to access protected resources, such as the Anka Build Cloud Controller.
When using OIDC, you'll need an Authorization Server. In this guide, we will use Keycloak as our Authorization Server as it's fairly easy to run and setup. It will contain the realm, client ID, user, group, and anything else we will need for logging into the Anka Build Cloud Controller.
This guide will be running the Anka Build Cloud and Keycloak on the same machine. It is meant to give you an idea of how to configure and is not recommended for production.
We will then log into the Anka Build Cloud Controller UI and use the /admin/ui#/controllerGroups page to create limited permissions for your groups.
Setup Keycloak in Docker
Run the docker container
docker run --rm -p 8080:8080 -e KEYCLOAK_USER=admin -e KEYCLOAK_PASSWORD=admin quay.io/keycloak/keycloak:latest
Configure your Keycloak
- Follow the instructions in https://www.keycloak.org/getting-started/getting-started-docker to set up your Keycloak:
- I used
myrealmas the Realm name. - I created user
nathanwith the password ofnathan(turn off Temporary). I filled in my full name too. - When creating the Client, I set
ankaas the Client ID, clicked Save, then enteredhttps://anka.controller:8090(this is the URL for the controller I run) for the Valid Redirect URIs. I also set Access Type to confidential and enabled Implicit Flow.
Next, create the
groupsClient Scope. Then, under Clients > anka > Client Scopes, add thegroupsClient Scope (select it and then click Add Selected). Then, back under thegroupsClient Scope, click Add Builtin, and choosegroups, then Add Selected.You can now create a group called
anka-controller-accessand then join it to the user you created.
At this point, you'll have Keycloak ready to use with your Anka Build Cloud Controller. Though, we need first to enable it.
Enable OpenID in your Controller configuration
In order to enable OpenID, you'll need to modify your docker-compose.yml (if you're using our docker package) or the /usr/local/bin/anka-controllerd (if you're using the native Mac package).
You can find a list of configuration options in the Configuration Reference by searching for
ANKA_OIDC
Here is what your docker-compose.yml should look like for use with Keycloak:
  anka-controller:
    container_name: anka-controller
    build:
       context: .
       dockerfile: anka-controller.docker
    ports:
       - "8090:80"
    volumes:
       - /Users/myUserName:/mnt/cert
    depends_on:
       - etcd
       - anka-registry
    restart: always
    environment:
      ANKA_REGISTRY_ADDR: "https://anka.registry:8089"
      ANKA_USE_HTTPS: "true"
      ANKA_SKIP_TLS_VERIFICATION: "false"
      ANKA_SERVER_CERT: "/mnt/cert/anka-controller-crt.pem"
      ANKA_SERVER_KEY: "/mnt/cert/anka-controller-key.pem"
      ANKA_CA_CERT: "/mnt/cert/anka-ca-crt.pem"
      ANKA_ENABLE_AUTH: "true"
      ANKA_ROOT_TOKEN: "1111111111"
      ANKA_OIDC_DISPLAY_NAME="Keycloak"
      ANKA_OIDC_PROVIDER_URL="http://host.docker.internal:8080/auth/realms/myrealm"
      ANKA_OIDC_CLIENT_ID="anka"

  anka-registry:
    container_name: anka-registry
    build:
        context: .
        dockerfile: anka-registry.docker
    ports:
        - "8089:8089"
    restart: always
    volumes:
      - "/Library/Application Support/Veertu/Anka/registry:/mnt/vol"
      - /Users/myUser/:/mnt/cert
    environment:
      ANKA_USE_HTTPS: "true"
      ANKA_SKIP_TLS_VERIFICATION: "false"
      ANKA_SERVER_CERT: "/mnt/cert/anka-controller-crt.pem"
      ANKA_SERVER_KEY: "/mnt/cert/anka-controller-key.pem"
      ANKA_CA_CERT: "/mnt/cert/anka-ca-crt.pem"
      ANKA_ENABLE_AUTH: "true"
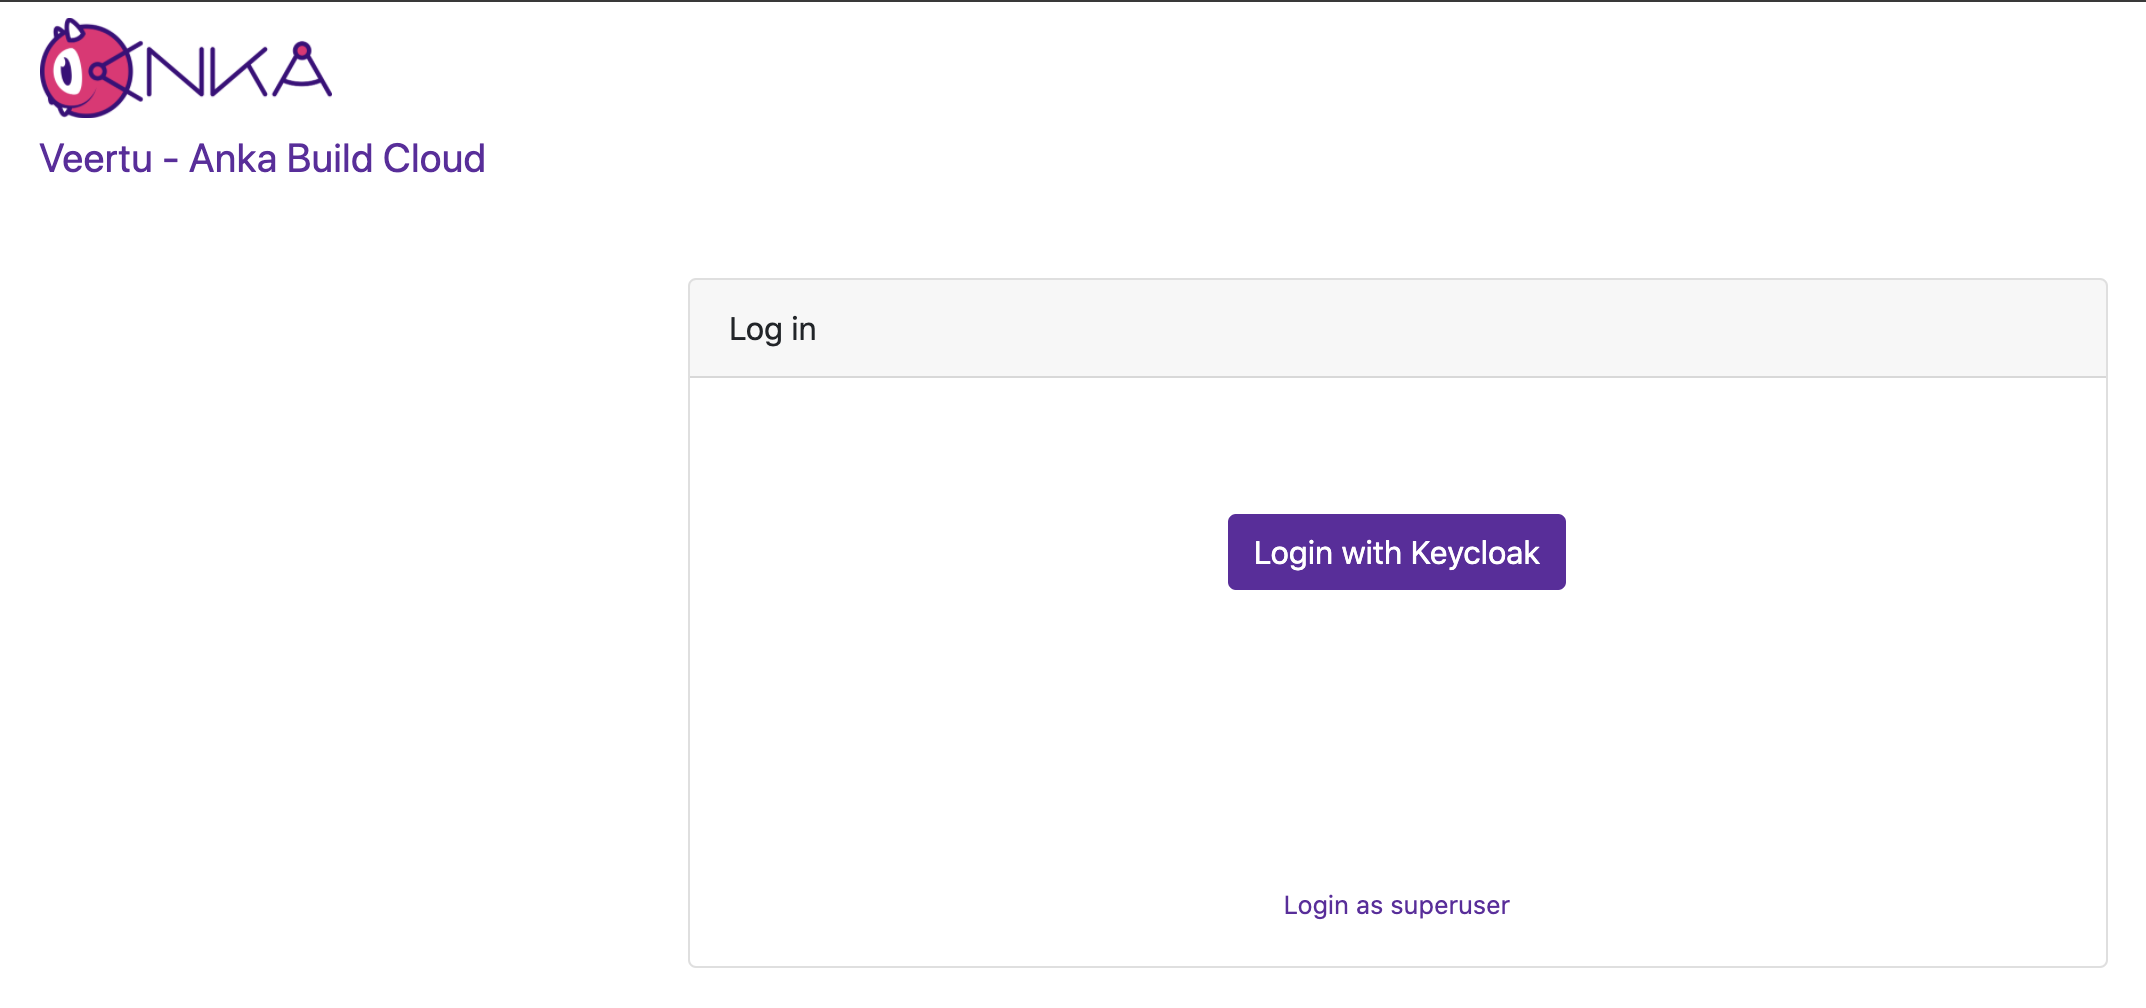
After that, just docker-compose down -t 50 && docker-compose up -d and try accessing the Controller at its HTTPS URL or IP. If you did everything correctly (you enabled certificate authentication and joined your node right?), you should see a Log In box with two options: Login with Keycloak and Login with superuser
We first want to log in with superuser (the ANKA_ROOT_TOKEN defined above in the config).
Once logged in, you will see Admin on the left navigation
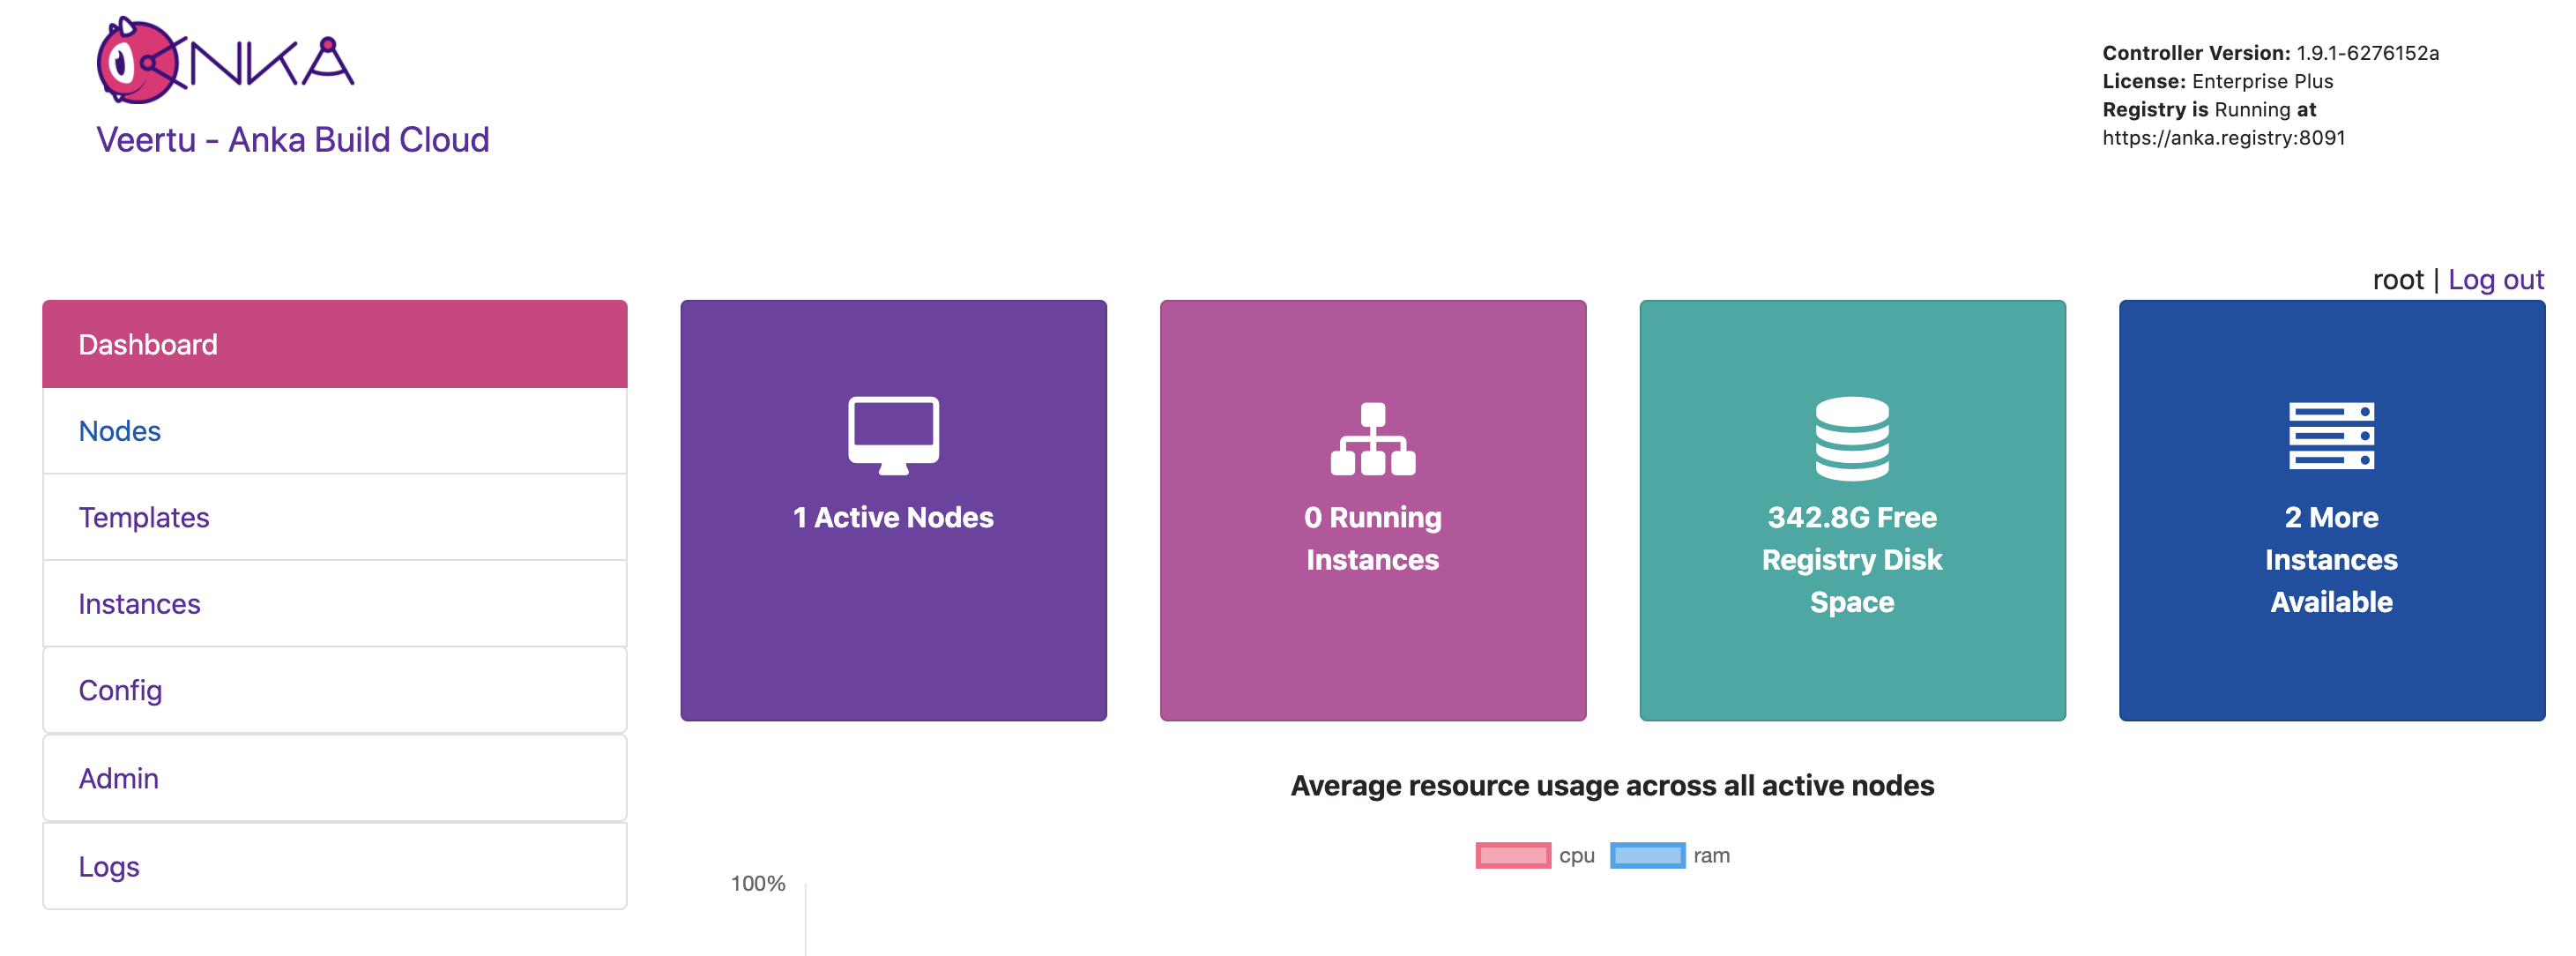
Under the Admin page, we want to add a New Group. The Group Name will be the name of the group you created within Keycloak.
Managing User/Group Permissions
This feature requires Enterprise Plus
Permission groups are configurable from your Controller's https://<controller address>/admin/ui page.
The permission groups here differ from the groups you assign to nodes within the Controller UI
When creating certificates, you'll want to specify CSR values using openssl's -subj option. For example, if we're going to generate a certificate so our Jenkins instance can access the Controller & Registry, you'll want to use something like this:
-subj "/O=MyOrgName/OU=$ORG_UNIT/CN=Jenkins"
Required values are
O=andCN=
Spaces are supported in
O=and Anka Build Cloud Controller version >= 1.10
Within the Controller, we use O= as the permission group name and CN= as the username. The Group Name will be MyOrgName, like we used in the -subj above.
The Available Permissions list will display all of the permissions we can assign to the group (see below for the full list). These permissions will allow plugins/users (like Jenkins) to communicate with the Controller & Registry:
get_groupsget_registry_disk_infohead_push_vmslist_imageslist_nodeslist_vmspull_vmpush_vmregistry_listsave_imagestart_vmterminate_vmupdate_vmupload_fileview_logs
Controller Permissions
| Permission | Description |
|---|---|
| Instances | |
list_vms | gives the user permission to list vms |
start_vm | gives the user permission to start vm |
terminate_vm | gives the user permission to terminate vm |
| Registry | |
get_registry_files | gives the user permission to get registry files (logs) |
view_logs | gives the user permission to view log files in dashboard |
get_registry_disk_info | gives the user permission to get registry disk info |
registry_list | gives the user permission to list vms on registry |
registry_delete | gives the user permission to registry delete |
| Nodes | |
list_nodes | gives the user permission to list nodes |
delete_node | gives the user permission to delete node |
change_node_config | gives the user permission to change node configuration |
| Node Groups | |
create_group | gives the user permission to create node groups |
get_groups | gives the user permission to view node groups |
delete_group | gives the user permission to delete node groups |
update_group | gives the user permission to update node groups |
add_node_to_group | gives the user permission to add a node to a node group |
remove_group_from_node | gives the user permission to remove a node from node group |
| Distribute VMs | |
registry_distribute | gives the user permission to distribute vms from registry |
registry_distribute_status | gives the user permission to view distribution statuses |
| Config | |
change_config | gives the user permission to change global configuration |
get_config | gives the user permission to view global configuration |
| Permissions and groups | |
view_permissions | gives the user permission to view the list of available permissions |
view_prmission_groups | gives the user permission to view permission groups |
update_permission_groups | gives the user permission to update permission groups |
delete_permission_groups | gives the user permission to delete permission groups |
Registry Permissions
| Permission | Description |
|---|---|
| Information about Registry | |
index | gives the user permission to view the registry index (welcome html file) |
get_disk_info | gives the user permission to get disk info |
| List VMs | |
list_vms | gives the user permission to list vms |
| Push VMs | |
head_push_vm | gives the user permission to “negotiate” a push (understand which files exists on the server and which files need to be sent) |
push_vm | gives the user permission to push vm and create new vms or tags |
| Pull VMs | |
pull_vm | gives the user permission to get a pull vm request (list of files needed for download and their paths) |
download_vm | gives the user permission to download vm files (as given by pull_vm) |
| Delete VMs | |
delete_vm | gives the user permission to delete a vm |
revert | gives the user permission to revert vm versions |
| File Server | |
upload_file | gives the user permission to upload a file |
download_file | gives the user permission to download a file |
| Log Server | |
get_streamer | gives the user permission to get an html streamer page (for logs) |
stream_log | gives the user permission to stream a log file (as given by get_streamer) |
get_log_archive | gives the user permission to download a log archive (tar.gz) |
send_log_event | gives the user permission to send log events (only applies specifically to eventLog) |
send_log | gives the user permission to send a log file row |
| Permissions and groups | |
view_permissions | gives the user permission to view the list of available permissions |
view_prmission_groups | gives the user permission to view permission groups |
update_permission_groups | gives the user permission to update permission groups |
delete_permission_groups | gives the user permission to delete permission groups |
Once you've added all of the proper permissions, you can now go back to the main Controller page and log out of the superuser. You can now choose Login with Keycloak, which will redirect you to your Keycloak to have you log in with the user you created earlier in this guide. You will then be taken to the Controller UI and be logged in as that user.
Feedback
Was this page helpful?
Glad to hear it! Please tell us how we can improve.
Sorry to hear that. Please tell us how we can improve.